If you’ve ever had issues with standing water in your yard or basement, you know how frustrating and damaging improper drainage can be. Fortunately, a simple yet effective solution exists: the French drain. In this comprehensive guide, we’ll explore how to install a French drain and why it’s essential for your property.
What is a French Drain, and How Does it Work?
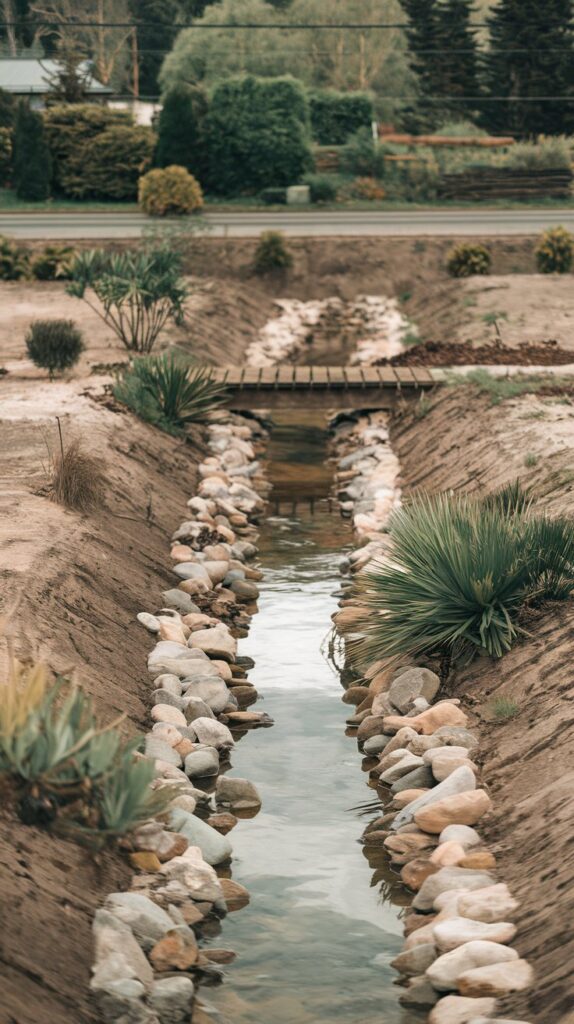
Before we dive into the process of installing a French drain, let’s first understand what it is and how it works. Essentially, a French drain is a trench filled with gravel or rock containing a perforated pipe. This pipe redirects surface water and groundwater away from a specific area, typically your home’s foundation or low spots in your yard. By guiding water to a safe drainage area, a French drain helps prevent flooding, erosion, and moisture-related problems.
A properly installed French drain acts like a water superhighway, allowing excess water to flow quickly away from your yard or home and into a designated drainage area, whether it’s a storm drain, dry well, or even a garden.
The Importance of Proper Drainage Solutions
Proper drainage is critical for several reasons. If water is allowed to pool around your home, it can cause a range of issues, including:
- Basement flooding
- Foundation damage
- Soil erosion
- Lawn and garden damage
- Mosquito breeding
When water doesn’t drain properly, it can seep into your home’s foundation, leading to cracks, mold growth, and costly repairs. This is why knowing how to install a French drain can be a lifesaver—both literally and financially!
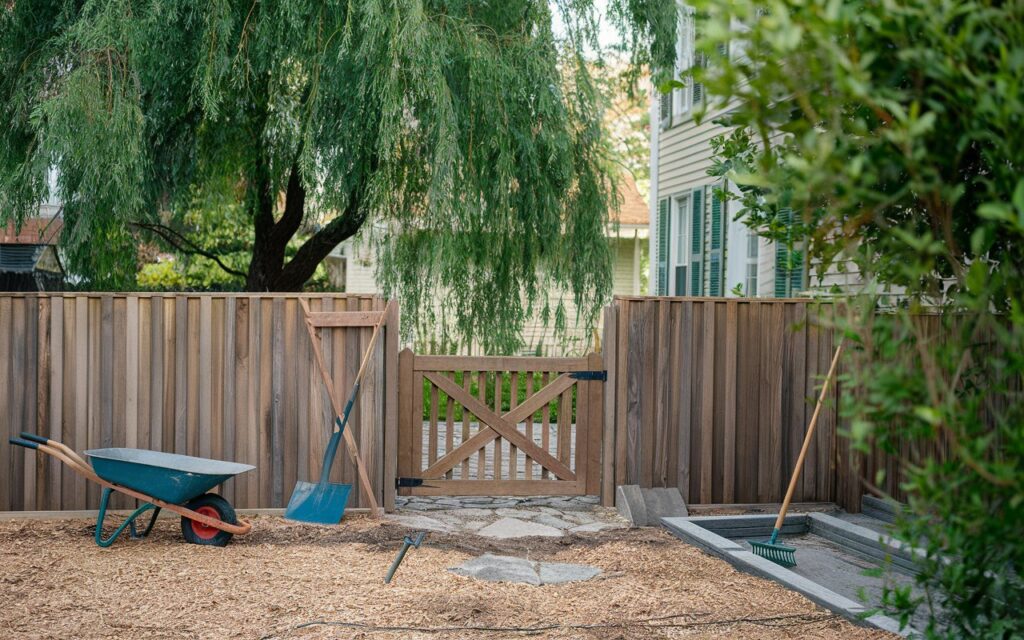
The Tools and Materials You’ll Need
Now that we understand the importance of a French drain, let’s get into the practical steps of installation. But first, gather the following tools and materials:
- Shovel or trenching tool
- Perforated pipe (PVC or flexible drainpipe)
- Gravel or crushed stone
- Landscaping fabric
- Level
- PVC glue and fittings (if using PVC pipes)
- Gravel rake
- Trowel
- Wheelbarrow (optional)
Step 1: Plan the Layout of Your French Drain
Like any successful project, proper planning is the foundation of a good French drain. Start by identifying the problem areas in your yard or basement. Look for low-lying spots where water tends to accumulate after rain. You’ll also want to map out where the water should go—this could be a storm drain, a dry well, or a natural slope that directs the water away from your home.
Personal Tip:
I remember when I installed my first French drain; I assumed that simply digging a trench would be enough. I quickly learned that without proper planning and identifying the right exit point for the water, the drain wouldn’t work effectively. Take your time in this step; it will save you headaches down the line!
Step 2: Digging the Trench
Once you have a solid plan, it’s time to start digging! The trench should be about 6 inches wide and 18-24 inches deep. The depth of your trench depends on the severity of your drainage issues and the size of your yard. The trench needs to slope slightly (about 1 inch per 8 feet) to ensure that water flows efficiently through the pipe.
Digging Tips:
- Use a level to ensure the slope is consistent.
- If you’re installing a French drain near your foundation, make sure the trench is at least 10 feet away to avoid undermining the foundation’s integrity.
- Avoid digging near trees or large roots, as these can interfere with the pipe over time.
Step 3: Laying the Landscaping Fabric
Next, you’ll want to line the trench with landscaping fabric. This will help prevent soil and debris from clogging your perforated pipe. Make sure the fabric is wide enough to cover the bottom and sides of the trench. Leave enough excess fabric on the sides so you can fold it over the gravel later.
The landscaping fabric plays a crucial role in ensuring the long-term effectiveness of your French drain. Without it, the surrounding soil could clog the perforated pipe, rendering the drain useless over time.
Step 4: Add Gravel to the Trench
Once the fabric is in place, it’s time to add a layer of gravel or crushed stone to the trench. The gravel should be about 2-3 inches deep at the bottom of the trench. This layer will help direct water into the perforated pipe and prevent clogging.
Use a gravel rake or trowel to smooth out the gravel, making sure it’s evenly distributed throughout the trench. This will help ensure that water flows smoothly through the drain.
Fun Fact:
French drains are named after Henry Flagg French, a lawyer and Assistant U.S. Treasury Secretary in the 19th century who popularized the system in his 1859 book on farm drainage. Who knew a lawyer would be behind one of the most efficient drainage solutions?
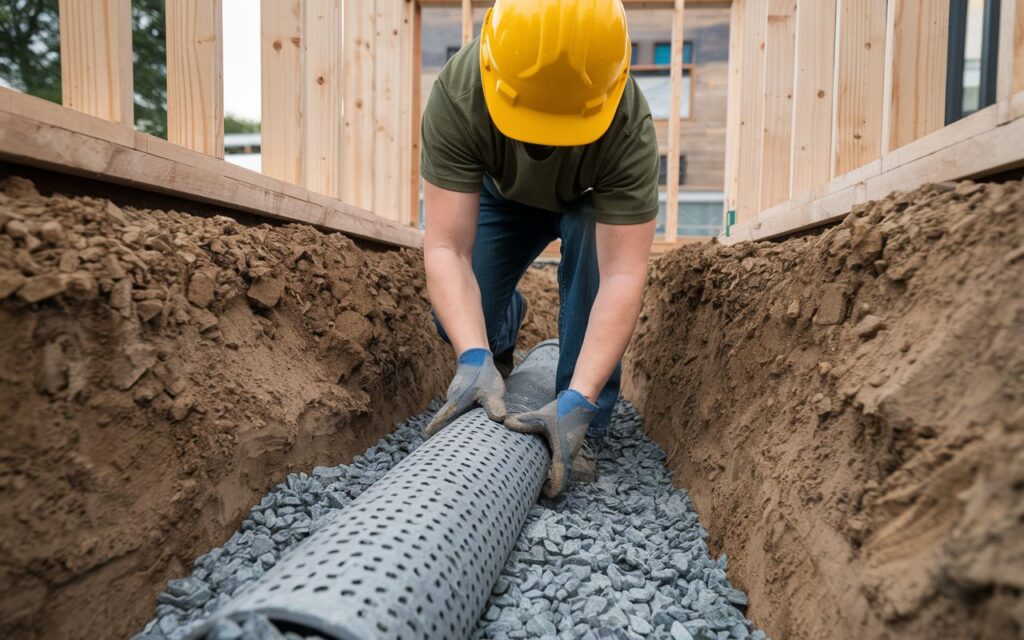
Step 5: Lay the Perforated Pipe
With the gravel in place, it’s time to lay your perforated pipe. Make sure the holes in the pipe face downward, as this will allow water to enter the pipe and flow away from your home. If you’re using PVC pipe, you may need to glue sections together using PVC fittings and adhesive. For flexible pipes, simply lay them in the trench, ensuring there are no kinks or twists.
Pro Tip:
Before placing the pipe in the trench, consider wrapping it in additional landscaping fabric for an extra layer of protection against clogging. This is especially useful if you have heavy clay soil or a lot of debris in your yard.
Step 6: Add More Gravel
Once the pipe is securely in place, add another layer of gravel to cover it. You’ll want about 3-4 inches of gravel above the pipe. This gravel layer will provide additional drainage and prevent soil from clogging the pipe.
Step 7: Fold Over the Fabric and Fill the Trench
After adding the final layer of gravel, fold the excess landscaping fabric over the top. This will create a barrier between the gravel and the soil, helping to prevent soil erosion and clogging. Once the fabric is in place, you can fill the rest of the trench with soil and sod, depending on your preference.
Common Mistakes to Avoid:
- Not sloping the trench properly: This can lead to standing water instead of drainage.
- Using the wrong type of pipe: Make sure you use a perforated pipe specifically designed for drainage.
- Forgetting the landscaping fabric: Skipping this step can lead to a clogged drain within months.
Step 8: Test Your French Drain
After completing your installation, it’s essential to test the drain by running water into the area you’re draining. Check the trench to ensure the water is flowing properly toward your exit point. If the water isn’t draining, you may need to adjust the slope or check for blockages.
A Personal Anecdote:
When I tested my first French drain, I noticed that water was pooling instead of draining. After some troubleshooting, I realized that the slope wasn’t steep enough. I had to go back, adjust the trench, and redo the gravel layer. It was a valuable lesson in precision!
Maintaining Your French Drain
Once you’ve installed your French drain, it’s essential to maintain it to ensure it continues to function correctly. Over time, debris and soil can build up in the trench, reducing its effectiveness. Here are a few tips for maintaining your French drain:
- Clean out debris regularly: Check for leaves, dirt, or any other debris that might clog the pipe.
- Inspect after heavy rains: After a big storm, inspect the drain to ensure water is flowing properly.
- Replenish gravel if necessary: Over time, gravel may settle or shift, so add more if needed.
Conclusion: Protecting Your Home and Yard
Learning how to install a French drain is an invaluable skill that can save you from costly water damage and foundation problems. Whether you’re dealing with a soggy lawn, basement flooding, or soil erosion, this simple drainage solution can provide long-lasting results. Proper planning, installation, and maintenance are the keys to a successful French drain system that keeps your home and yard dry.
By following the steps in this guide, you’ll have the confidence to tackle your own yard makeover and protect your home from the damaging effects of improper drainage. And remember, when it comes to home improvement projects like installing a French drain, precision, and attention to detail are your best friends.

Tips and Tricks to Avoid Common Pitfalls When Installing a French Drain
Learning how to install a French drain can be a rewarding experience, offering a long-term solution to water pooling in your yard or basement. However, like many DIY projects, installing a French drain comes with its own set of challenges. Missteps in the process can lead to costly repairs and ineffective drainage systems, negating all your hard work. By understanding the common mistakes and taking the right precautions, you can ensure your French drain installation is successful and long-lasting.
This guide will dive deep into the pitfalls many homeowners face when installing a French drain and provide expert tips to avoid these mistakes. From understanding the right slope to choosing the correct materials, we will cover everything you need to know to ensure your French drain works efficiently for years to come.
1. Failing to Create the Right Slope
One of the most crucial aspects of installing a French drain is ensuring the slope is adequate. The purpose of a French drain is to guide water away from your home or yard, and this requires gravity to do the heavy lifting. The proper slope will encourage water to flow naturally through the system. Without the correct angle, water will pool or stagnate, which defeats the purpose of the drain.
How to Install a French Drain Tip:
- Create a slope of about 1 inch for every 10 feet of the trench length. This ensures that water moves efficiently through the pipe and exits at the correct location.
- Use a level or slope gauge to ensure you achieve this incline as you dig. If you’re unsure, consider hiring a professional to verify the slope before proceeding.
2. Not Planning the Drainage Path Correctly
Many homeowners underestimate the importance of planning the drainage route. It’s not enough to just remove water from one spot; you need to think about where the water will go after it exits the drain. Poor planning can result in directing water to unwanted areas, like a neighbor’s yard or back toward the house.
How to Install a French Drain Tip:
- Identify a safe drainage location well before you start digging. This might be a storm drain, a dry well, or a low-lying area of your yard far from your foundation.
- Consult local regulations to ensure you’re not violating any drainage laws, especially if your chosen drainage path leads to public property.
3. Using the Wrong Type of Pipe
The pipe you use for your French drain is critical. Many people assume any old pipe will do the job, but that’s not the case. A solid pipe won’t allow water to enter from the surrounding soil, while a pipe that’s too perforated may clog easily.
How to Install a French Drain Tip:
- Opt for corrugated perforated pipe designed specifically for French drains. These pipes have small holes that allow water to enter the pipe while preventing large debris from getting in. Some pipes also come with a sock or filter fabric that can be particularly useful in areas with loose soil or sand, which can clog the system.
4. Forgetting to Call Utility Companies
One of the most overlooked steps in any digging project is contacting utility companies to locate underground lines. Failing to do so can be dangerous and illegal in many areas. Striking a gas line, electrical conduit, or water main can not only delay your project but also result in hefty fines or personal injury.
How to Install a French Drain Tip:
- Always call 811 or your local utility locating service before you start digging. They will send someone out to mark the locations of underground utilities so you can avoid them during your project. This simple step can save you from significant headaches down the road.
5. Not Using Enough Gravel
The gravel layer around your French drain pipe serves as the primary filtration system, preventing sediment from entering the pipe and clogging it over time. Some DIYers skimp on gravel to save money, but this is a critical mistake. Too little gravel can lead to a blocked pipe, while the wrong type of gravel can hinder proper water flow.
How to Install a French Drain Tip:
- Use 1 ½-inch clean gravel around the pipe. This type of gravel allows for good water flow and prevents clogging. Be sure to use at least 6 inches of gravel underneath the pipe and 12 inches of gravel above it to create an efficient filtration layer.
6. Neglecting to Use Filter Fabric
While gravel is excellent for filtering water, it won’t stop soil from entering the system and clogging the pipe over time. For this reason, using a geotextile filter fabric is essential. This fabric keeps soil and fine particles out of your French drain while allowing water to pass through.
How to Install a French Drain Tip:
- Wrap the entire French drain system in filter fabric. Lay the fabric in the trench before adding gravel, and then wrap it over the top of the gravel before you cover the trench with soil. This added layer of protection will help extend the life of your drain by preventing clogs.
7. Improper Pipe Placement
Simply placing the pipe in the trench without considering the direction of the holes can render your French drain ineffective. Many people make the mistake of placing perforated pipes with holes facing down, believing that this will help collect water from below the pipe. In reality, this placement can cause water to bypass the drain altogether.
How to Install a French Drain Tip:
- Place perforated pipes with the holes facing up. This allows water to enter from above and flow through the system effectively. The gravel below the pipe will handle water absorption from the soil.
8. Underestimating the Importance of Proper Maintenance
Even a well-installed French drain requires regular maintenance to function properly over the long term. Neglecting maintenance can lead to clogged pipes, backed-up water, and eventual system failure.
How to Install a French Drain Tip:
- Clear debris from the drainage exit point regularly. Leaves, twigs, and other debris can accumulate and block the outflow of water. Additionally, inspect your French drain annually to ensure it’s working correctly and not clogged.
- If you live in an area with heavy rainfall, consider scheduling more frequent inspections, especially after major storms.
9. Failing to Research Local Building Codes
Many municipalities have specific regulations about drainage systems, including French drains. Failing to comply with these regulations can result in fines, forced removal of the drain, or other legal issues. Additionally, improper drainage can cause harm to neighboring properties, leading to potential liability.
How to Install a French Drain Tip:
- Research local building codes before starting your project. Some areas may require a permit for drainage systems or have restrictions on where you can divert water. Taking the time to understand these rules will help you avoid costly legal issues in the future.
10. Ignoring Erosion Control Measures
When digging a trench and installing a French drain, it’s easy to forget about erosion control. Without proper measures, heavy rainfall can wash soil and debris into your trench, clogging the system or causing structural issues.
How to Install a French Drain Tip:
- Use erosion control fabric to stabilize the soil around your trench. This will help prevent loose dirt from eroding into the drain and blocking the flow of water. In areas with a steep slope, you may also need to install additional erosion control measures, such as retaining walls or plants with deep root systems.
Conclusion
Installing a French drain may seem like a daunting task, but with careful planning and attention to detail, you can avoid the common mistakes that lead to system failure. From ensuring the correct slope to selecting the right materials and maintaining your drain over time, each step plays a critical role in creating an efficient and long-lasting drainage solution.
By following the tips and tricks outlined in this guide on how to install a French drain, you’ll be well-equipped to tackle the project with confidence. Just remember to take your time, consult local regulations, and seek professional advice if needed. When done right, a French drain can save you from years of water-related problems, keeping your home and yard dry for the long haul.